Based on Gutter Cleaning near me: When installing gutters, one of the most important steps is joining the gutter elbows. Gutter elbows are essential for directing water flow and preventing water from pooling on your roof or around your home’s foundation.
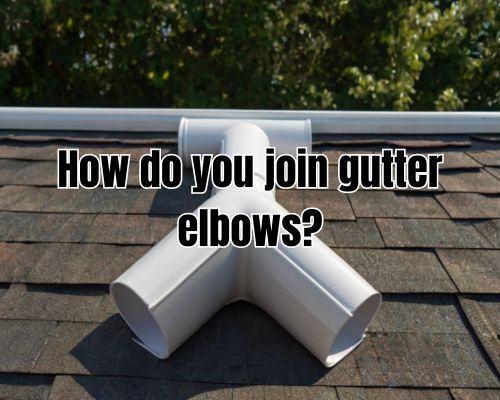
There are several different methods for joining gutter elbows, depending on the type of gutter system you have and the specific needs of your home. Some common methods include using screws or rivets to attach the elbows to the gutters, using sealant to create a watertight seal between the elbows and the gutters, or using special connectors designed specifically for joining gutter elbows.
Regardless of the method you choose, make sure that the joints are secure and watertight to prevent leaks and ensure that water flows smoothly through your gutters and downspouts.
When joining gutter elbows, you also need to consider the placement of your downspouts. Downspouts are the vertical pipes that connect to the gutter system and direct water away from your home’s foundation.
Properly positioning your downspouts can help prevent water damage and erosion, so it’s important to plan ahead and make sure that your gutter elbows are properly aligned with your downspouts.
Preparing for Installation
Assessing Gutter and Downspout Configuration
Before you begin installing your gutter elbows, you need to assess your gutter and downspout configuration. This is important because it will help you determine the number of elbows you need and where they should be placed.
Take a close look at your gutter system and determine where the downspouts are located and how they are connected to the gutters. This will help you determine where you need to install the elbows and how many you need.
Gathering Necessary Tools and Materials
Once you have assessed your gutter and downspout configuration, you can begin gathering the necessary tools and materials for the installation process. Here are some of the tools and materials you will need:
- Ladder: You will need a ladder to safely access your gutters and downspouts.
- Screws: You will need screws to attach the elbows to the gutters and downspouts.
- Sealant: You will need sealant to create a watertight seal between the elbows and the gutters and downspouts.
- Saw: You will need a saw to cut the gutters and downspouts to the correct length.
- Drill: You will need a drill to create pilot holes for the screws.
- Pliers: You will need pliers to crimp the elbows onto the gutters and downspouts.
- Crimping tool: You will need a crimping tool to crimp the elbows onto the gutters and downspouts.
- Tin snips: You will need tin snips to cut the gutters and downspouts to the correct length.
- Power drill: You will need a power drill to create pilot holes for the screws.
- Gutter material: You will need gutter material to create the elbows.
- Hardware: You will need hardware to attach the elbows to the gutters and downspouts.
Installing Gutter Elbows
When installing gutter elbows, there are a few key steps to keep in mind to ensure proper water flow and angle adjustment. With Gutter Cleaning near me, we’ll cover everything you need to know to get the job done right.
Measuring and Cutting the Downspout
Before you can install your gutter elbows, you’ll need to measure and cut your downspout to the appropriate length. Make sure to measure carefully, leaving enough room for your elbow fittings.
Once you’ve determined the proper length, use a crimping tool to crimp the end of the downspout to fit snugly into the elbow.
Connecting Elbows to the Downspout
Once your downspout is cut to the right length, it’s time to connect your elbow fittings. Start by inserting the bottom of the downspout into the top entry of the elbow.
The downspout should taper in slightly as it approaches the ground. With the end inserted into the elbow, draining rainwater can easily flow through the elbow and out the bottom of the downspout.
Securing the Elbow and Downspout to the Fascia
To secure your elbow and downspout to the fascia, you’ll need to use brackets or hangers. Make sure to use the appropriate size and type of bracket for your gutter run and downspout.
Attach the brackets to the fascia board with nails or rivets, making sure everything is level and secure.
Ensuring Proper Water Flow and Angle Adjustment
Once your elbow and downspout are securely attached, it’s important to ensure proper water flow and angle adjustment.
Make sure the elbow is angled away from your home’s foundation to prevent water damage. Use a drill bit to make a hole in the bottom of the downspout if necessary, to allow rainwater to flow freely away from your home.
In addition to the steps above, it’s important to choose high-quality materials for your gutter system. For example, aluminum gutters ensure durability and resistance to corrosion.
Consider adding corner pieces, end caps, and hidden hangers to your gutter system for a polished finish.
By following these steps and using high-quality materials, you can ensure your gutter system will effectively collect and divert rainwater away from your home’s foundation.